Easy Buttermilk Waffles Recipe for Perfect Homemade Breakfast
Easy Buttermilk Waffles Recipe for Perfect Homemade Breakfast
Are you tired of dry, flavorless waffles or waffle mixes that just don’t deliver breakfast magic? Many home cooks assume making waffles from scratch is intimidating or time-consuming, but it doesn’t have to be that way. With this easy buttermilk waffles recipe, you’ll experience the joy of perfectly crisp, fluffy waffles every time—no fancy equipment or complicated steps required. Let’s dive into how you can elevate your morning routine and create a delicious homemade breakfast that’s both simple and satisfying.
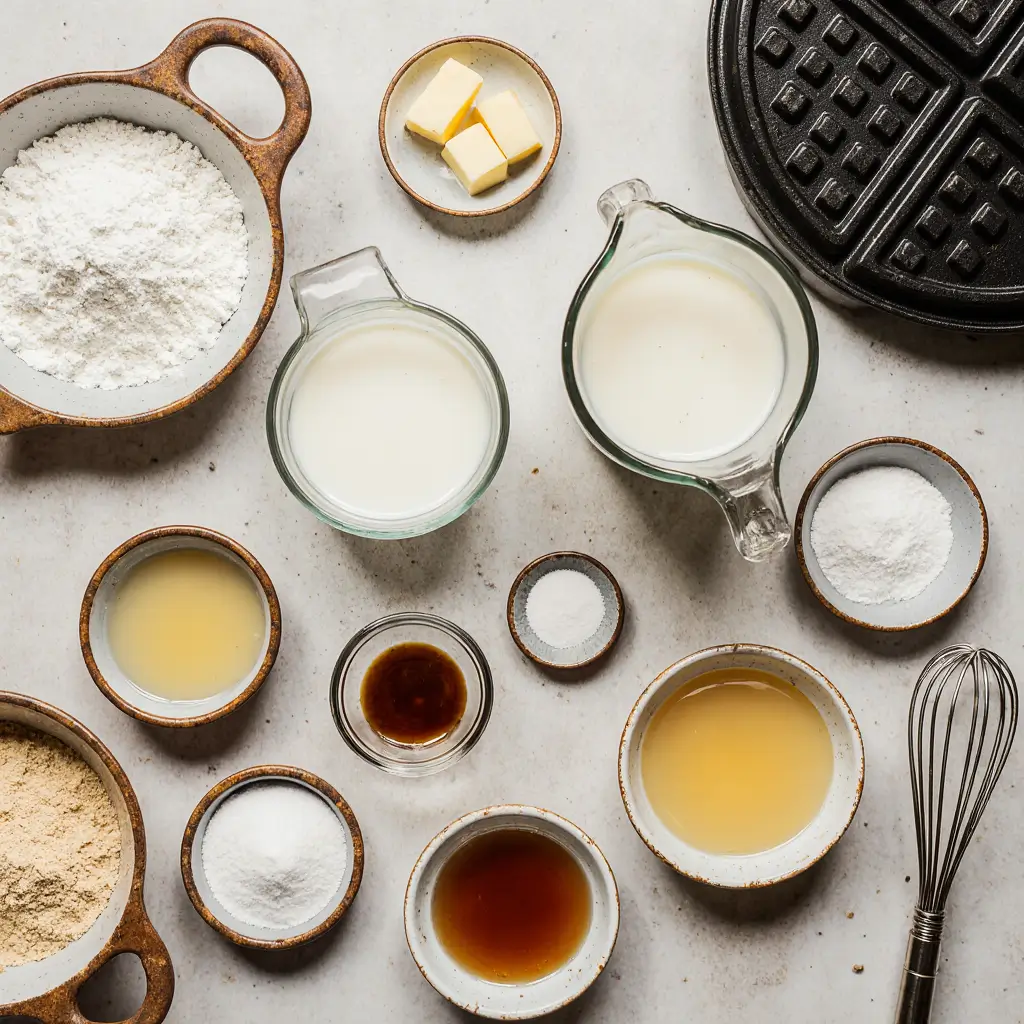
Ingredients List Buttermilk Waffles
To craft these perfect homemade waffles, you’ll need just a handful of pantry staples. Here’s what to gather before you start:
– 2 cups all-purpose flour
– 2 tablespoons granulated sugar (can substitute with coconut sugar or maple syrup for a healthier alternative)
– 1 teaspoon baking powder
– 1/2 teaspoon baking soda
– 1/2 teaspoon salt
– 2 large eggs
– 1 3/4 cups buttermilk (can substitute with plain yogurt thinned with milk or a dairy-free buttermilk alternative)
– 1/2 cup unsalted butter, melted (coconut oil works well for a dairy-free option)
– 1 teaspoon pure vanilla extract
Each ingredient plays a special role—from the tangy buttermilk creating a tender crumb to the baking powder and soda ensuring light rise and crispness.
Timing
Getting the timing right is key to waffles that are beautifully golden on the outside and fluffy inside.
– Preparation Time: About 10 minutes
– Cook Time: Approximately 15 minutes (depending on your waffle maker)
– Total Time: Roughly 25 minutes from start to finish
As you mix, you’ll notice the batter’s smooth texture that promises a great waffle base. The kitchen will fill with the comforting smell of vanilla and warm, toasted flour as your waffles cook. The short cook time means you won’t be stuck waiting forever to enjoy your treat.
Step-by-Step Instructions Buttermilk Waffles
Step 1: Preheat your waffle iron
Preheating your waffle iron thoroughly ensures even cooking. Most irons have an indicator light—wait until it signals ready. Chef’s tip: Lightly grease with non-stick spray or a brush of melted butter for crisp edges.
Step 2: Combine the dry ingredients
In a large bowl, whisk together flour, sugar, baking powder, baking soda, and salt. This step evenly distributes the leavening agents to give your waffles consistent rise.
Step 3: Whisk the wet ingredients
In a separate bowl, beat the eggs until frothy. Add the buttermilk, melted butter, and vanilla extract, whisking until well combined.
Step 4: Mix the batter
Gradually pour wet ingredients into the dry mix, stirring gently until just combined. Avoid over-mixing; a few lumps are fine and help keep the waffles fluffy. Pro tip: Let the batter rest for 5 minutes to help the gluten relax and to get tender waffles.
Step 5: Cook the waffles
Pour batter onto the preheated waffle iron (usually 1/2 to 3/4 cup, depending on size). Close the lid and cook until steam stops rising, or according to your waffle maker’s instructions—typically 4 to 5 minutes. Carefully remove and place on a wire rack to keep crisp while you finish cooking the rest.
Nutritional Information
Enjoying these waffles as a balanced breakfast can fuel your day. Here’s an approximate breakdown per waffle (makes about 8 waffles):
– Calories: 220
– Protein: 6g
– Carbohydrates: 28g
– Fat: 9g
– Fiber: 1g
– Sugar: 5g
– Sodium: 310mg
– Calcium: 12% of daily value (from buttermilk)
These numbers make it easy to adapt the recipe based on your dietary goals or portion preferences.
Healthier Alternatives
If you want to boost nutrition without sacrificing flavor, consider these swaps:
– Use whole wheat flour or a 50/50 mix for extra fiber and nutrients.
– Replace granulated sugar with natural sweeteners like honey or mashed banana.
– Swap butter for heart-healthy olive oil or avocado oil.
– Use Greek yogurt thinned with milk instead of buttermilk for more protein.
– Add ground flaxseed or chia seeds to the batter for omega-3s and fiber.
These tweaks make your waffles even more wholesome while still tasting amazing.
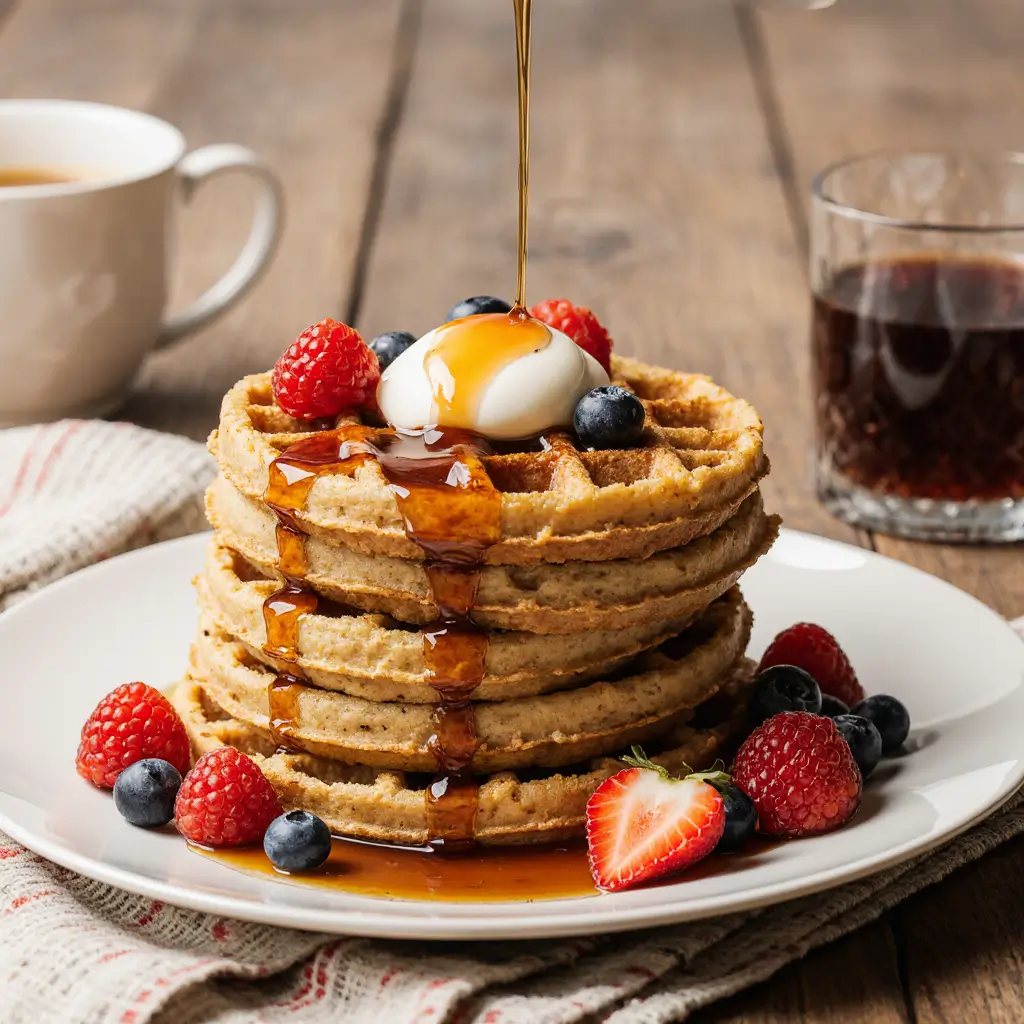
Serving Suggestions
There are countless ways to elevate your waffle breakfast beyond syrup:
– Top with fresh berries, sliced bananas, or seasonal fruit compote for natural sweetness and vibrant color.
– Dollop whipped cream, Greek yogurt, or nut butter for creaminess and richness.
– Sprinkle with chopped nuts or seeds to add crunch and flavor.
– Serve alongside crispy bacon, sautéed mushrooms, or scrambled eggs for a hearty brunch spread.
– For a festive touch, dust with cinnamon sugar or drizzle with dark chocolate sauce.
Experiment with your favorite flavors and textures to keep your breakfast exciting.
Common Mistakes to Avoid
– Over-mixing the batter: This leads to tough and dense waffles. Stir until just combined for tender results.
– Not preheating the waffle iron: Your waffles won’t crisp properly if the iron isn’t hot enough.
– Opening the waffle iron too early: Let the waffle cook fully to avoid tearing or sticking.
– Skipping butter or oil: This helps create that perfect golden crust and keeps waffles from drying out.
– Pouring too much batter: Overflows make a mess and can prevent even cooking. Use the recommended amount your waffle maker suggests.
Avoiding these common pitfalls will guarantee breakfast perfection every time.
Storing Tips
If you have leftovers (though unlikely!), store waffles properly for future enjoyment:
– Cool waffles completely on a wire rack before storing to prevent sogginess.
– Stack with parchment paper between each waffle and seal tightly in an airtight container or ziplock bag.
– Refrigerate for up to 3 days or freeze for up to 1 month.
– To reheat, use a toaster or oven set to 350°F (175°C) for about 5 minutes to restore crispness. Avoid the microwave as it makes waffles chewy.
Proper storage helps maintain that fresh-from-the-iron texture day after day.
Conclusion
This simple yet foolproof recipe brings the joy of crispy, fluffy waffles right to your kitchen. With minimal ingredients and easy instructions, elevating your homemade breakfast to café quality is entirely within reach. Ready to start your morning with a plate full of comforting goodness? Share your waffle creations in the comments or subscribe for more delicious recipes!
FAQs
Q1: Can I make the waffle batter ahead of time?
Yes! The batter can be refrigerated for up to 24 hours. The waffles might be slightly less fluffy, so give the batter a gentle stir before cooking.
Q2: What if I don’t have buttermilk?
Simply mix 1 tablespoon of lemon juice or white vinegar with 1 3/4 cups of milk and let it sit for 5 minutes. This homemade buttermilk substitute works great.
Q3: How do I prevent waffles from sticking to the iron?
Ensure your waffle maker is preheated well and lightly grease the plates before adding batter—especially important for first runs or less non-stick surfaces.
Q4: Can I freeze cooked waffles?
Absolutely! Freeze cooled waffles in a single layer or stacked with parchment paper, then toast or reheat directly from the freezer for convenient breakfasts.
Q5: Are these waffles gluten-free?
This recipe uses all-purpose flour, which contains gluten. To make gluten-free waffles, substitute with a gluten-free flour blend designed for baking.
—
If you want to try other breakfast delights, check out our Classic French Toast recipe or our guide to the Best Pancakes from Scratch. Happy cooking and enjoy your perfect homemade breakfast!