Easy Vanilla Bean Milkshake Recipe for a Delicious Treat
Introduction
Have you ever wondered how to make a truly indulgent vanilla milkshake that tastes like it came from your favorite diner, but without any fuss? Many people assume that crafting the perfect vanilla shake requires fancy ingredients or expensive equipment, but that’s far from the truth. This easy vanilla bean milkshake recipe for a delicious treat combines simplicity with rich, creamy flavor, making it accessible for home cooks of all skill levels. Whether you’re craving a classic dessert or a delicious drink to cool off on a hot day, this recipe will become your go-to for satisfying that sweet tooth.
Ingredients List
To make this luscious shake, you’ll need just a handful of high-quality ingredients that pack a punch in flavor. Here’s what you’ll need, plus some handy substitutions to suit your taste or dietary preferences:
– 2 cups vanilla ice cream (For a dairy-free option, use coconut or almond milk-based ice cream)
– 1 cup whole milk (Substitute with oat, soy, or almond milk for lactose intolerance or vegan diets)
– 1 vanilla bean pod (If unavailable, 2 teaspoons pure vanilla extract works well)
– 2 tablespoons sugar (Optional; can be swapped with honey, maple syrup, or agave nectar)
– Whipped cream (For garnish; use coconut whipped cream for vegan-friendly topping)
– A pinch of salt (Enhances all the flavors)
– Ice cubes (Optional, for an extra-chilled shake)
Timing
Preparing this creamy delight doesn’t require a significant time commitment, making it perfect for a quick indulgence or last-minute treat.
– Prep Time: 5 minutes (scraping vanilla seeds and gathering ingredients)
– Cook Time: 0 minutes (no cooking involved)
– Total Time: Approximately 5-7 minutes (depending on blending time and garnishing)
In under ten minutes, you’ll have a shake that’s perfectly cool, thick, and utterly satisfying—ideal for beating afternoon cravings or rounding off a weekend brunch.
Step-by-Step Instructions
Step 1: Prepare the Vanilla Bean
Start by slicing the vanilla bean pod lengthwise with a sharp knife. Using the back of the knife, gently scrape out the tiny fragrant seeds. These seeds are where the signature vanilla flavor lives, so don’t skip this step.
Chef’s Tip: If you’re using vanilla extract instead, add it directly in the blending step.
Step 2: Combine Ingredients in Blender
Add the vanilla ice cream, whole milk, vanilla seeds, sugar, and a pinch of salt into your blender. If you want a colder or thicker shake, toss in a few ice cubes.
Chef’s Tip: For a richer texture, reduce the milk to 3/4 cup and increase the ice cream by 1/4 cup.
Step 3: Blend Until Smooth
Secure the lid tightly and blend on high speed for about 30-60 seconds or until the mixture is smooth and creamy. Watch the texture as it blends — it should be thick but drinkable.
Chef’s Tip: Avoid over-blending, as this can thin out your shake.
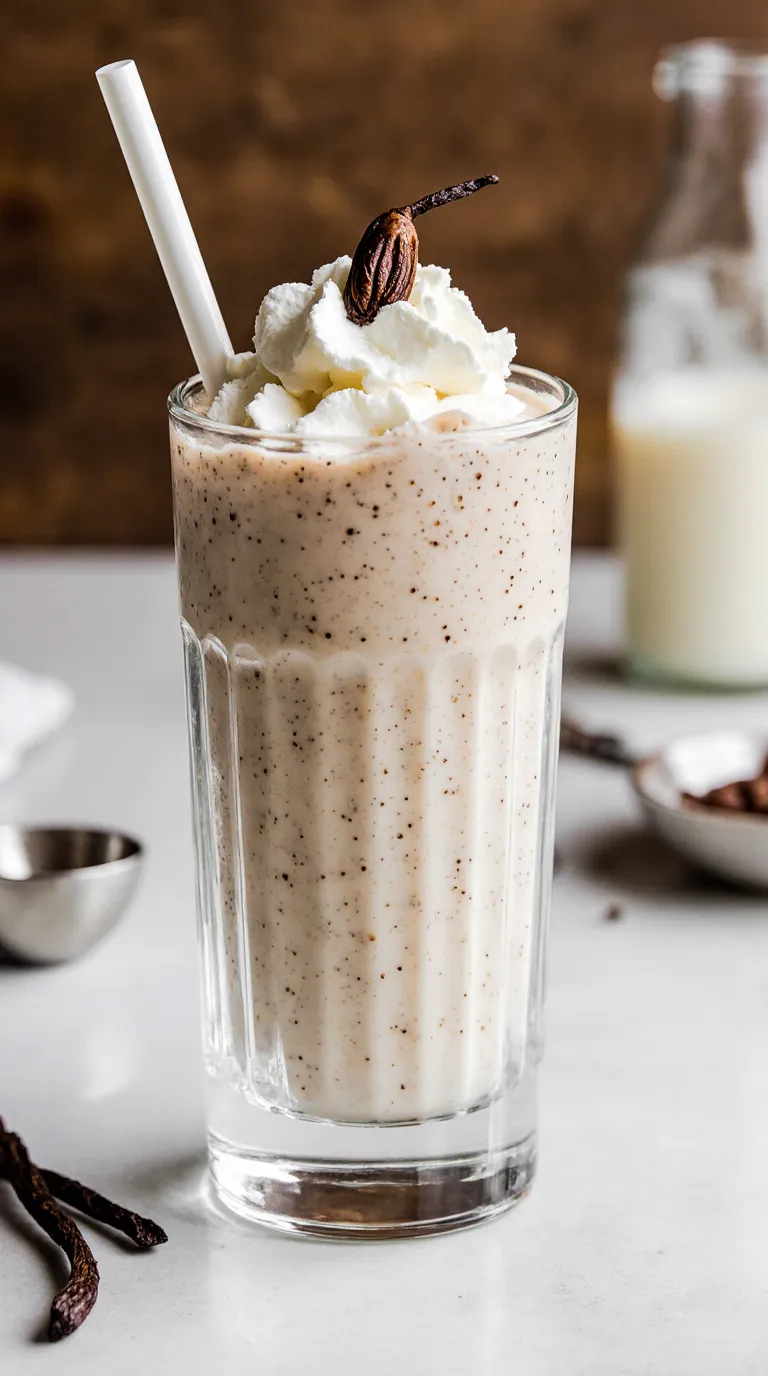
Step 4: Serve with Style
Pour the milkshake into chilled glasses. Top with a generous swirl of whipped cream and, if you like, a sprinkle of nutmeg or a vanilla bean pod as a fancy garnish.
Alternative Garnish: Use chocolate shavings or crushed cookies for added texture.
Step 5: Enjoy Immediately
Milkshakes are best enjoyed right after making them to savor the full creaminess and fresh vanilla aroma.

Nutritional Information
Here’s a breakdown per serving (based on 2 servings):
– Calories: Approximately 350-400 kcal
– Protein: 7-8 grams
– Fat: 14-18 grams (largely from dairy or alternatives)
– Carbohydrates: 45-50 grams (including natural and added sugars)
– Fiber: 0-1 gram
– Calcium: About 25% of the daily recommended intake
– Vitamin D: Depends on milk choice and fortification
Keep in mind, the figures can vary based on ice cream and milk selections.
Healthier Alternatives
Want to enjoy this sweet treat with fewer calories or more nutritional benefits? Consider these swaps:
– Use low-fat or plant-based milk alternatives to reduce saturated fat.
– Opt for natural sweeteners like maple syrup or honey to avoid refined sugar.
– Add a scoop of protein powder or nut butter for an extra energy boost.
– Incorporate Greek yogurt instead of ice cream to cut calories and add probiotics.
– Blend in a handful of spinach or avocado for creaminess plus an unexpected nutrient hit.
These tweaks will make your milkshake more nourishing without compromising on flavor.
Serving Suggestions
This vanilla bean delight is wonderfully versatile and pairs well with various accompaniments:
– Serve alongside warm apple pie or freshly baked cookies for a nostalgic dessert combo.
– For a brunch upgrade, garnish with fresh berries or a drizzle of caramel sauce.
– Add a splash of coffee or espresso to create a homemade vanilla latte shake.
– Include a dash of cinnamon or nutmeg for a cozy fall-inspired twist.
– Pour into mini mason jars and freeze overnight for homemade vanilla bean ice pops.
Seasonal fruit garnishes like peaches in summer or cranberries in winter add freshness and color.
Common Mistakes to Avoid
To ensure your milkshake turns out irresistibly smooth and flavorful, watch out for these pitfalls:
– Using low-quality vanilla: Using imitation vanilla extract or cheap vanilla powders can result in a flat taste—always opt for pure or fresh vanilla beans.
– Over-blending: Excessive blending can melt the ice cream too much, making your shake watery.
– Skipping the pinch of salt: This tiny addition enhances the sweetness and overall profile.
– Ignoring chilling: Use cold ingredients and chilled glasses to keep the shake refreshing longer.
– Too much sugar: Taste before adding sugar since some ice cream varieties are already quite sweet.
Storing Tips
Milkshakes are best enjoyed fresh, but if you have leftovers, here’s how to keep them tasty:
– Pour the shake into an airtight container and refrigerate for up to 24 hours.
– Shake or stir before drinking, as separation may occur.
– Avoid freezing leftover shakes as they tend to lose their creamy texture when thawed.
– For longer storage, consider freezing separate components like ice cream or blending fresh.
Re-blending slightly with milk can restore creaminess if the shake thickens too much overnight.
Conclusion
With just a few straightforward steps, you can whip up a rich and creamy vanilla bean milkshake that feels like a decadent treat but is surprisingly simple to make. Whether enjoyed as an indulgence or paired with other desserts, this recipe brings sweet satisfaction to your kitchen with minimal effort. Don’t forget to try the healthier alternatives or experiment with seasonal garnishes to elevate your shake experience.
Ready to take your milkshake skills to the next level? Share your results in the comments below or subscribe for more delicious recipes delivered right to you!
FAQs
Q1: Can I use regular vanilla extract instead of a vanilla bean?
Absolutely! Using 2 teaspoons of pure vanilla extract is a convenient substitute, though the flavor won’t be quite as intense or fresh as real vanilla beans.
Q2: How can I make this recipe vegan-friendly?
Swap the dairy ice cream with coconut or almond milk-based vegan ice cream and use a plant-based milk alternative. Use coconut whipped cream for topping.
Q3: Can I make this recipe ahead of time?
While best fresh, you can refrigerate leftovers for up to 24 hours. Just re-blend before serving to restore texture.
Q4: What can I add to make the milkshake more filling?
Add a tablespoon of peanut butter, protein powder, or Greek yogurt for an added boost of protein and richness.
Q5: How can I make this milkshake less sweet?
Reduce or omit added sugar and choose an ice cream brand with lower sugar content. Adding a pinch of salt will balance flavors without sweeteners.
—
For more sweet treat ideas, check out our Classic Chocolate Milkshake Recipe or tips on Perfecting Homemade Ice Cream. Happy blending!