Delicious Chocolate Waffles Recipe for Perfect Homemade Treats
Discover the Secret to Perfect Homemade Chocolate Waffles
Have you ever wondered what makes some chocolate waffles irresistibly fluffy and bursting with rich cocoa flavor? Many home cooks find themselves frustrated by waffles that turn out soggy, dense, or lacking that chocolaty punch. If you’ve been searching for the ultimate solution, you’re in the right place. This delicious chocolate waffles recipe for perfect homemade treats will change your breakfast game, offering a mouthwatering balance of crispiness and chocolaty goodness that everyone will love.
From ingredient choices to cooking tips, this guide is designed to help you master the art of homemade chocolate waffles effortlessly. Whether you’re planning a cozy weekend brunch or a special dessert, these waffles are a sure hit.
Ingredients List
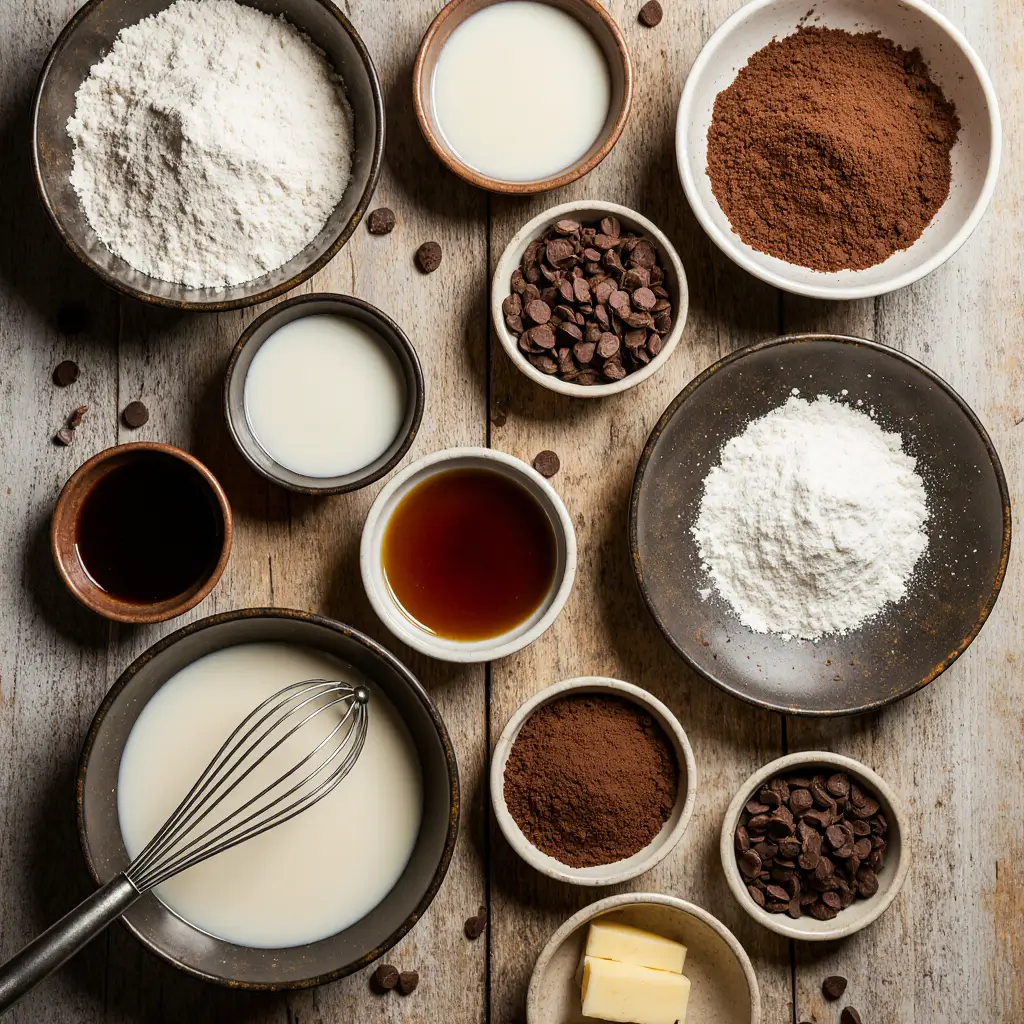
Crafting the perfect waffles starts with selecting the right ingredients. Here’s the precise list you’ll need, plus options to customize based on your taste or dietary needs:
– 1 ¾ cups all-purpose flour
Substitution: Use whole wheat pastry flour for a nuttier flavor and increased fiber.
– ¼ cup unsweetened cocoa powder
Pro tip: Dutch-processed cocoa powder offers a smoother, richer chocolate taste.
– 2 tablespoons granulated sugar
Healthier swap: Coconut sugar or maple syrup can add a natural sweetness.
– 1 tablespoon baking powder
– ½ teaspoon baking soda
– ¼ teaspoon salt
– 2 large eggs
– 1 ¾ cups milk (whole milk preferred)
Substitution: Almond milk or oat milk for lactose intolerance or vegan options.
– ½ cup unsalted butter, melted
Alternative: Coconut oil or vegan butter for dairy-free waffles.
– 1 teaspoon pure vanilla extract
– ½ cup semi-sweet chocolate chips (optional, for extra chocolaty bites)
Timing
Understanding timing is crucial to achieve that perfect waffle texture—crispy on the outside, tender inside, and full of chocolate aroma.
– Prep time: 10 minutes
Start by gathering all ingredients and getting your waffle iron preheated. The aroma of melted butter and cocoa powder during prep is a real treat!
– Cook time: 15 minutes (about 3-4 minutes per waffle)
Expect a toasty, golden-brown exterior with a slight chocolatey sheen.
– Total time: 25 minutes
Just enough time to whip up a quick batch for your morning caffeine fix or an indulgent dessert.
Step-by-Step Instructions
1. Preheat and Prepare Your Waffle Iron
Begin by preheating your waffle iron to medium-high heat. Lightly grease it using butter or non-stick spray to prevent sticking.
2. Mix the Dry Ingredients
In a large bowl, whisk together the flour, cocoa powder, sugar, baking powder, baking soda, and salt. This ensures an even distribution of the rising agents and cocoa, avoiding clumps.
3. Combine the Wet Ingredients
In a separate bowl, beat the eggs and milk together, then stir in the melted butter and vanilla extract. Warm milk helps the butter integrate smoothly.
4. Bring Wet and Dry Ingredients Together
Pour the wet mixture into the dry ingredients, gently mixing until just combined. Avoid overmixing to keep waffles tender and avoid tough gluten development.
5. Fold in Chocolate Chips (Optional)
Gently fold in chocolate chips to distribute pockets of melted chocolate in every bite.
6. Pour Batter and Cook
Spoon about ½ cup of batter onto the hot waffle iron. Close the lid carefully and cook for 3-4 minutes or until steam subsides and waffles are crisp to touch.
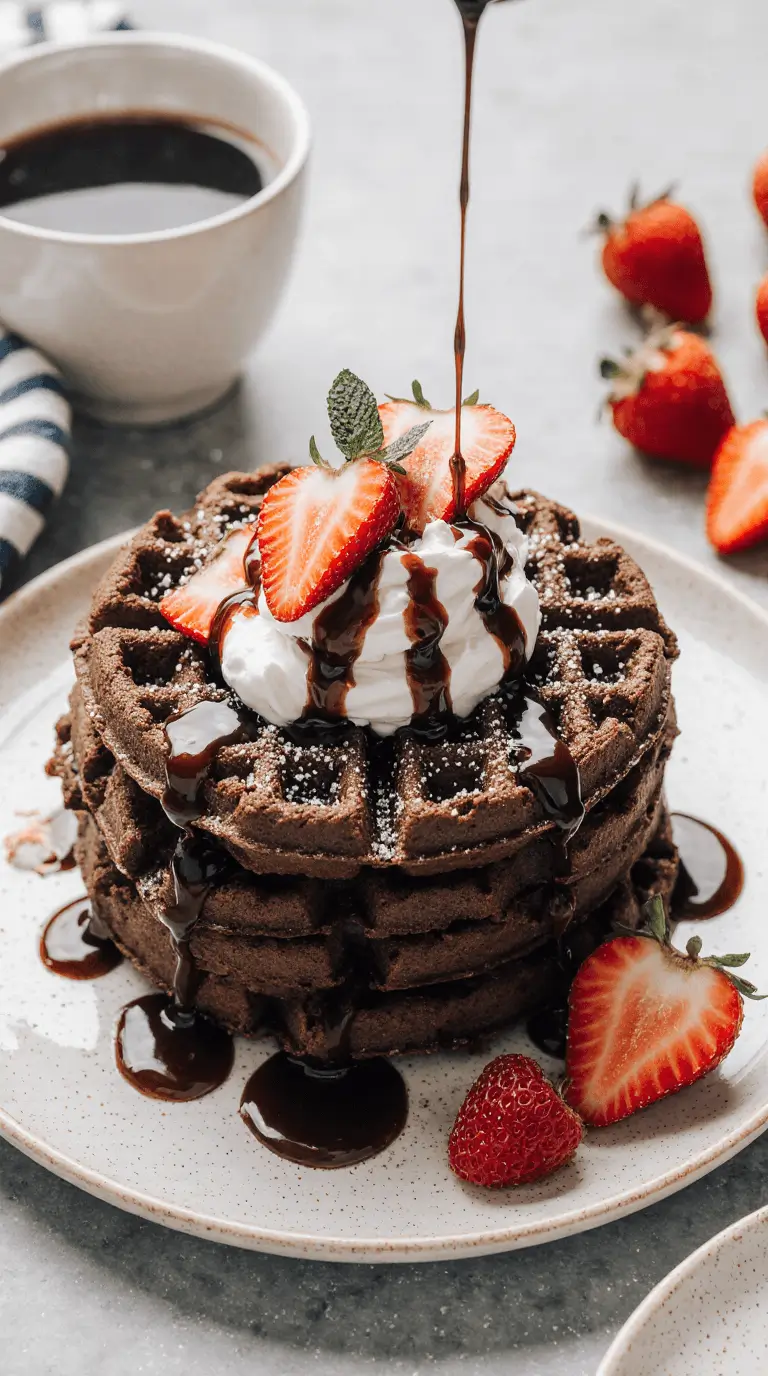
7. Serve Immediately or Keep Warm
Transfer waffles to a wire rack to maintain crispness while cooking the rest. Serve hot with your favorite toppings.
Chef’s tip: For even crispier waffles, leave them on the rack for 5 minutes before plating to avoid sogginess from steam condensation.
Nutritional Information
Here’s a quick snapshot of the nutrition per serving (based on 1 waffle):
– Calories: ~280 kcal
– Protein: 7g
– Fat: 15g (mainly from butter and eggs)
– Carbohydrates: 30g
– Fiber: 3g
– Sugars: 7g
– Calcium: Approximately 150mg (from milk)
Knowing this helps you balance your meal or tweak the recipe for dietary goals.
Healthier Alternatives
Looking to enjoy this treat without guilt? Consider these swaps:
– Replace all-purpose flour with whole wheat flour for added fiber and nutrients.
– Use natural sweeteners like honey or maple syrup instead of granulated sugar.
– Swap butter for mashed avocado or Greek yogurt to reduce saturated fat.
– Incorporate flax or chia seeds for an omega-3 boost.
– Experiment with almond milk or soy milk to lower calories and accommodate lactose intolerance.
These alternatives can make your chocolate waffles a nutritious yet indulgent breakfast.
Serving Suggestions
Elevate your waffles with creative, seasonal toppings:
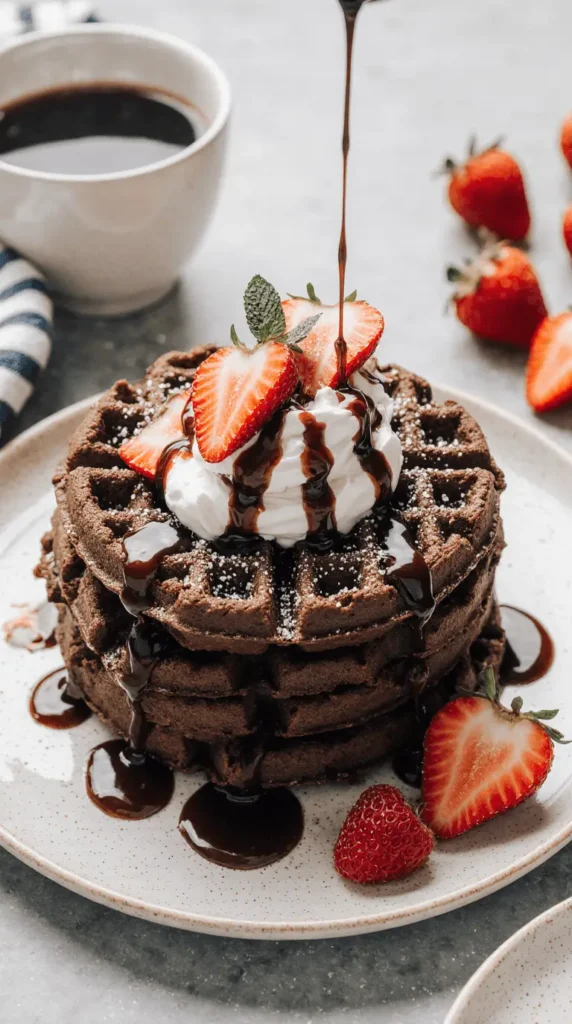
– Fresh berries such as strawberries, blueberries, or raspberries for a tart contrast.
– A dollop of whipped cream or coconut cream for creaminess.
– A drizzle of pure maple syrup, honey, or chocolate ganache for extra decadence.
– Toasted nuts like pecans or walnuts for crunch and texture.
– For a special twist, serve alongside a scoop of vanilla or coffee ice cream during warmer months.
Pair your chocolate waffles with a hot cup of coffee or a frothy cappuccino for the ultimate breakfast experience.
Common Mistakes to Avoid
Even experienced cooks can stumble. Here’s what to watch out for when making these waffles:
– Overmixing the batter: It leads to tough, rubbery waffles; mix until just combined.
– Not preheating the waffle iron completely: Results in uneven cooking and sticking.
– Using cold ingredients: Room temperature eggs and milk blend better yielding a smoother batter.
– Opening the iron too soon: Interrupts cooking and causes waffles to fall apart.
– Stacking waffles directly: This traps steam and makes them soggy — cool on a wire rack instead.
Avoid these errors to ensure consistent, delicious results every time.
Storing Tips
Want to save leftovers? Follow these tips to preserve freshness:
– Allow waffles to cool completely on a wire rack to prevent condensation.
– Store in an airtight container or resealable bag, separating layers with parchment paper.
– Refrigerate for up to 3 days; reheat in a toaster or oven for a crisp finish.
– For longer storage, freeze waffles individually before transferring to a freezer bag. They keep well for up to 2 months.
Reheating in a toaster oven or conventional oven retains crispness better than the microwave.
Conclusion
This guide unlocks everything you need to create perfectly fluffy, richly chocolaty waffles with ease. With versatile ingredient swaps, practical tips, and tasty serving ideas, you’re set to impress at breakfast or anytime. Ready to whip up your batch of delicious waffles? Don’t forget to share your tasty creations and thoughts in the comments or subscribe for more delightful recipes!
FAQs
Q1: Can I make the waffle batter ahead of time?
Yes! You can prepare the batter up to a day in advance. Store it covered in the refrigerator, then give it a gentle stir before using. This can even enhance flavor as the ingredients meld.
Q2: What kind of waffle iron works best for chocolate waffles?
A Belgian waffle maker is ideal for thick, fluffy waffles with deep pockets that hold syrup and toppings perfectly. Non-stick surfaces are key for easy removal.
Q3: Can I make these waffles gluten-free?
Absolutely! Swap all-purpose flour for a gluten-free blend. Just be sure your baking powder is gluten-free and adjust liquids slightly if needed.
Q4: How can I make these waffles vegan?
Use plant-based milk (almond, soy, or oat), replace eggs with flax or chia egg (1 tablespoon ground seeds + 3 tablespoons water per egg), and substitute butter with coconut oil or vegan margarine.
Q5: What’s the secret to crispy waffles?
Ensure the waffle iron is fully heated, avoid stacking waffles right away, use melted butter in the batter, and serve immediately or keep warm on a wire rack.
—
For more breakfast inspiration, check out our fluffy buttermilk pancakes or our guide on best kitchen tools for waffle makers. Happy cooking!