Irresistible Red Velvet Crinkle Cookies Recipe
Introduction
Have you ever wondered how to achieve the perfect balance between a soft, cakey interior and a delicate crackled exterior in a cookie? Many bakers believe that red velvet treats are limited to cakes or cupcakes, but red velvet crinkle cookies offer a delightful twist that’s equally irresistible. This recipe brings together the classic flavors of red velvet—rich cocoa, tangy cream cheese, and a hint of vanilla—in a fun, easy-to-make cookie form. If you’ve struggled with getting the perfect texture or vibrant color in your cookies, this red velvet crinkle cookies recipe will solve those challenges and elevate your baking game.
Ingredients List
Creating these red velvet crinkle cookies requires a mix of staple baking ingredients and a few special touches to get that signature look and taste. Here’s what you’ll need:
– 1 ½ cups all-purpose flour (substitute with gluten-free flour blend for gluten sensitivity)
– 2 tablespoons unsweetened cocoa powder (Dutch-processed for richer flavor)
– ½ teaspoon baking powder
– ¼ teaspoon salt
– ½ cup unsalted butter, softened (use coconut oil or vegan butter alternative for dairy-free)
– ¾ cup granulated sugar
– 1 large egg (can replace with flax egg for vegan option)
– 1 tablespoon red food coloring (natural beet juice powder is a great alternative)
– 1 teaspoon vanilla extract
– ½ teaspoon white vinegar (adds tang and reacts with baking soda for rise)
– Powdered sugar, for coating
These ingredients blend classic red velvet elements with cookie essentials to deliver an authentic taste and texture.
Timing
Being mindful of timing is essential when preparing these crowd-pleasing treats. Here’s what the process will look like:
– Prep time: 15 minutes – This includes gathering ingredients, mixing the dough, and preparing your baking sheets.
– Cook time: 12-14 minutes – Watch closely as these cookies bake to reach that perfect crackled surface.
– Total time: Approximately 30 minutes – From mixing to cooling, your kitchen will soon be filled with irresistible aromas.
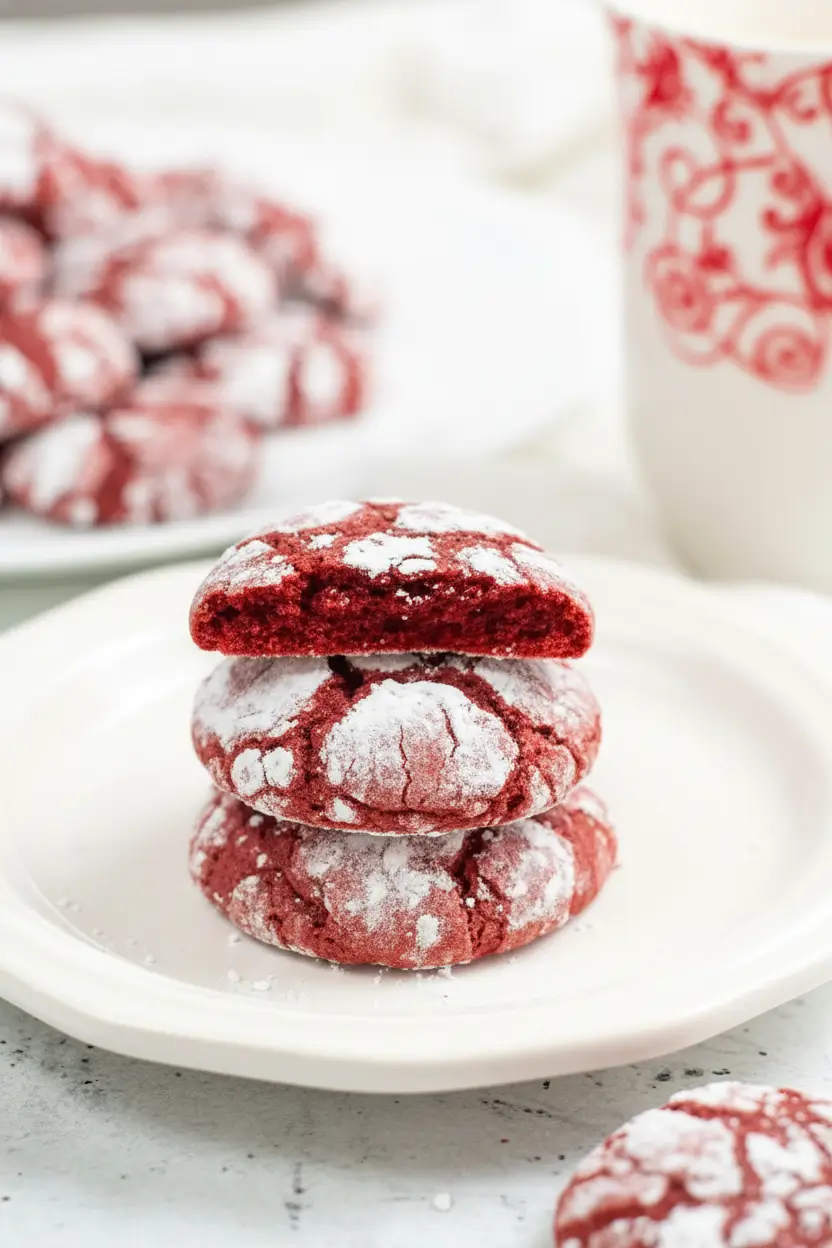
You’ll notice the dough is slightly sticky, making the powdered sugar coating all the more important for that classic crinkle effect. And when these cookies come out of the oven, they’ll be soft to the touch but gradually firm up as they cool.
Step-by-Step Instructions
Step 1: Prepare Your Dry Ingredients
In a medium bowl, sift together the flour, cocoa powder, baking powder, and salt. This ensures even distribution and prevents clumps, which is key to a smooth batter.
Chef’s Tip: Using Dutch-processed cocoa powder enhances the cookie’s color and gives it that professional bakery flavor.
Step 2: Cream Butter and Sugar
In a large mixing bowl, beat the softened butter and granulated sugar until light and fluffy. This aerates the mixture, contributing to a soft crumb.
Chef’s Tip: For best results, use room temperature butter to avoid lumps and uneven mixing.
Step 3: Add Wet Ingredients
Add the egg, red food coloring, vanilla extract, and white vinegar to the butter-sugar mixture. Beat until fully combined and the vibrant red color develops.
Chef’s Tip: A high-quality vanilla extract greatly boosts flavor, so opt for pure vanilla over imitation.
Step 4: Combine Wet and Dry Ingredients
Slowly fold the dry ingredients into the wet ingredients until just incorporated—avoid overmixing to keep cookies tender.
Step 5: Chill the Dough
Cover the dough and chill in the refrigerator for at least 1 hour. This solidifies the dough, making it easier to roll and helps develop the cookie’s texture.
Chef’s Tip: You can chill the dough overnight—this even enhances flavor.
Step 6: Form and Coat Cookies
Preheat your oven to 350°F (175°C). Scoop tablespoon-sized dough balls and roll each ball generously in powdered sugar until fully coated. Place them 2 inches apart on parchment-lined baking sheets.
Step 7: Bake and Cool
Bake for 12-14 minutes, until the cookies have puffed and the crackled tops are clearly visible. Allow cookies to cool on the baking sheet for 5 minutes before transferring to a wire rack.
Chef’s Tip: For crispier edges, bake slightly longer, but be careful not to overbake as the center should stay soft.
Nutritional Information
Here’s a basic nutritional breakdown per cookie (based on 24 cookies):
– Calories: ~120
– Total Fat: 6g (Saturated Fat: 3.5g)
– Carbohydrates: 16g
– Sugars: 10g
– Protein: 1.5g
– Fiber: 1g
– Sodium: 55mg
These treats deliver a satisfying sweet bite, perfect for occasional indulgence. For a more detailed macronutrient analysis, consider using apps like MyFitnessPal while adjusting for any ingredient substitutions.
Healthier Alternatives
Want to make these crinkle cookies more guilt-free? Here are some simple swaps:
– Use whole wheat pastry flour instead of all-purpose for added fiber.
– Replace granulated sugar with coconut sugar or a natural honey alternative, adjusting wet ingredients accordingly.
– Swap butter for avocado oil or mashed banana in the recipe for a heart-healthy fat source.
– Use a natural plant-based milk substitute if incorporating any liquid ingredient (for vegan dietary needs).
– Incorporate flaxseed meal for added omega-3s by replacing the egg with a flax egg.
These swaps maintain the classic taste while boosting the nutritional profile and accommodating dietary requirements.
Serving Suggestions
Red velvet crinkle cookies are versatile and pair beautifully with:
– A tall glass of cold milk or plant-based milk substitutes.
– A dollop of whipped cream or cream cheese frosting for dessert boards.
– Fresh berries like strawberries or raspberries, enhancing the red velvet theme.
– Drizzled melted dark chocolate or white chocolate curls for an elegant touch.
– Chilled coffee or a robust red wine for adult gatherings.
These seasonal pairings complement the mild cocoa and cream cheese tang inherent in the recipe.
Common Mistakes to Avoid
To ensure your cookies come out perfect every time, avoid these rookie errors:
– Skipping the chilling step: The dough needs to firm up to avoid spreading too much during baking.
– Not rolling enough in powdered sugar: This step is key to the signature crackled look.
– Overbaking: Baking too long turns the cookies dry and hard; aim for a soft center with crackled tops.
– Mixing too vigorously: Overmixing develops gluten and makes the cookies tough rather than tender.
– Using expired baking powder or cocoa: Fresh ingredients ensure proper rising and rich flavor.
Following these pointers will elevate the experience and outcome.
Storing Tips
To keep your red velvet crinkle cookies fresh:
– Store cookies in an airtight container at room temperature for up to 5 days.
– For longer storage, freeze cooled cookies layered between parchment paper in a sealed container for up to 3 months.
– When ready to eat, thaw at room temperature or warm in a low oven for a few minutes to revive softness.
– Avoid refrigeration, as it can dry out the cookies.
Proper storage preserves their moist texture and delightful flavor.
Conclusion
These soft, tender, and visually stunning red velvet crinkle cookies are a delightful upgrade to any baking repertoire. With simple ingredients, clear steps, and expert tips, you’ll enjoy baking and sharing this classic treat that’s perfect year-round. Don’t forget to share your baking successes below or subscribe to our newsletter for more delicious recipes!
FAQs
Q1: Can I make these cookies dairy-free?
Absolutely! Substitute butter with vegan butter or coconut oil and use a flax egg instead of the chicken egg to make a fully dairy and egg-free version.
Q2: Why do my red velvet cookies not crackle?
If your cookies don’t crackle, it’s likely the dough wasn’t chilled long enough or not rolled adequately in powdered sugar. Chilling tightens the dough, which cracks when baked.
Q3: Can I use natural food coloring instead of synthetic?
Yes! Beet juice powder or pomegranate juice concentrate are plant-based alternatives that provide vibrant red hues without artificial additives.
Q4: How do I ensure cookies are soft rather than crisp?
Avoid overbaking and keep an eye on the baking time. Removing cookies from the oven when the edges are firm but centers are slightly underbaked helps maintain softness.
Q5: Can I double this recipe?
Definitely. Just make sure your mixing bowls and baking trays can handle the larger batches, and chill the dough in two batches for best results.
—
If you’re ready to dive into more cookie recipes, check out our Ultimate Chocolate Chip Cookies and Chewy Snickerdoodles for perfect baking inspiration. Happy baking!